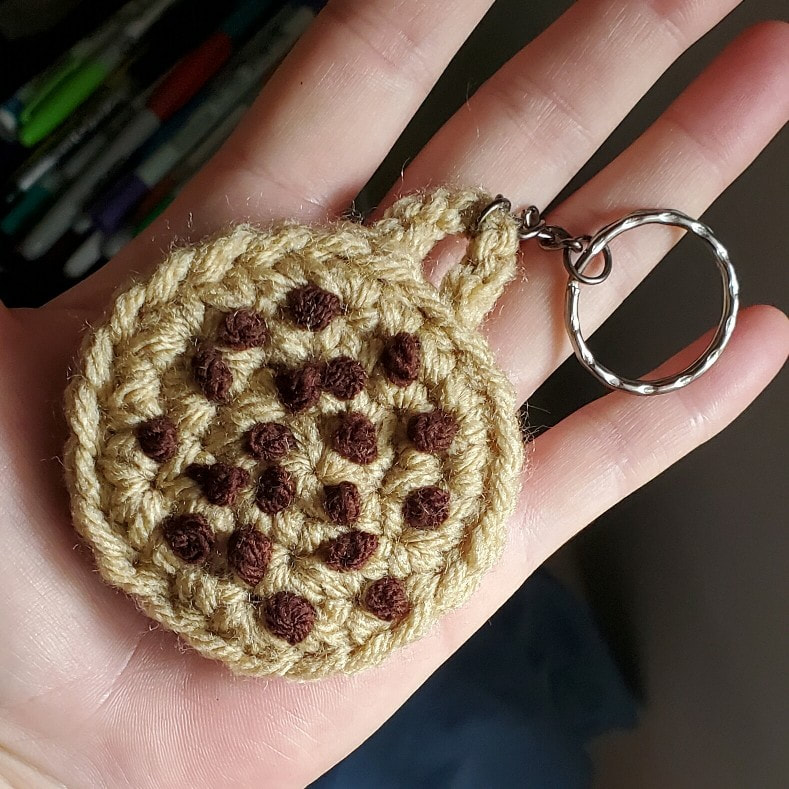
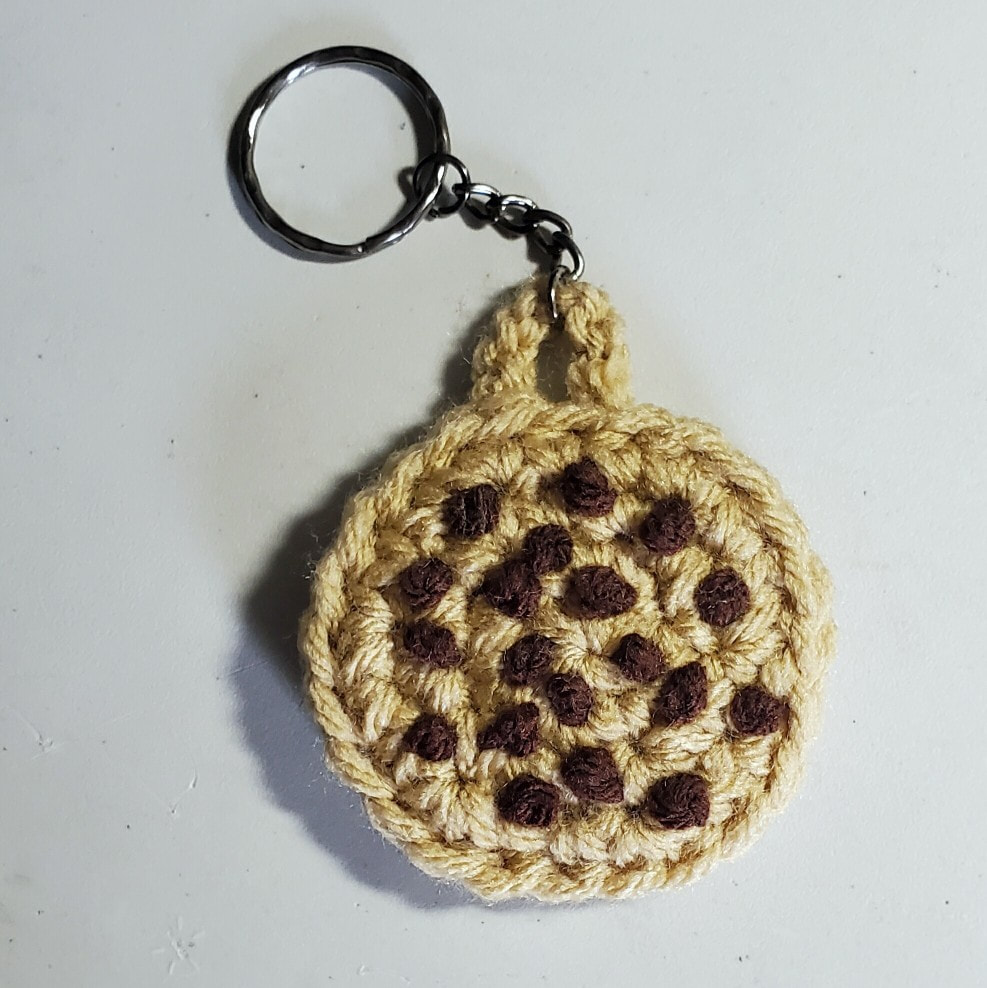
Make cookies with me!I hadn't made time to crochet in who knows how long. But once I picked it up again, holey moley! It's all I want to do some days. At first I dove into big blanket projects that took weeks to finish, and now that initial flaming hot passion has mellowed into a warm, consistent glow. Smaller projects are really nice, ya know?
These crochet cookies are quick & easy, don't use much yarn, make nice gifts, and help you find your keys should they get buried in a bag or something. If you don't want to make one yourself, I have some already made! Chocolate Chip Cookie Keychains available here: www.etsy.com/AngelHawariArt/listing/1233320888/keychain-chocolate-chip-cookie-crochet?utm_source=Copy&utm_medium=ListingManager&utm_campaign=Share&utm_term=so.lmsm&share_time=1654984600160 The only stitches you need to know are single crochets and slip stitches so this is a good project for all skill levels. It starts with a magic ring. So if you would like a demo, pop over to my Youtube channel here: youtu.be/r_hKv0iSm04 (the magic ring starts at minute 3:15 if you wanna fast forward right to it) ♥ On to the instructions ♥ “Chocolate Chip Cookie” crochet pattern Hook size: 5mm Yarn: 4 medium/worsted weight Colors: tan & dark brown Abbreviation Key: SC = single crochet inc = increase, multiple stitches worked into the same stitch. Otherwise, only one stitch worked into each stitch. Stitches are worked into both the front & back loops of stitches. Front piece: *Rounds 1-4 tan yarn Round 1: Magic ring, 6SC into ring, pull ring closed, but do not tie off or slip stitch to the first SC. Round 2: Work 2SC inc into each of the 6 stitches from round 1. You will have 12 stitches all the way around. Round 3: 2SC inc, 1SC, 2SC inc, 1SC…repeat this sequence until there are 18 stitches around. *place a stitch marker in the first SC at the beginning of the round. Round 4: 2SC inc, 2SC, 2SC inc, 2SC…repeat until 24 stitches around. Cut yarn. Invisible join. Hand embroider French knots onto the right side of the front piece to make the chocolate chips. Back Piece: Repeat rounds 1-4 to make the back piece. Assembling your Cookie: Align front & back pieces, wrong sides together, and join with slip stitches all the way around. Cut yarn. Weave in ends. Done! You can now add a hanging loop and/or key chain hardware for a cute accessory perfect for keeping or gifting. I hope you have fun with these! I have around a dozen now. Thank you all! And I hope you have a really nice, relaxing time making play food. Which I totally didn't get the point of, but now I do! It's just silly and fun. Happy Stitching! If there is anything I can help with, comment below or use the contact form and I'm happy to help.
0 Comments
Leave a Reply. |
Archives
November 2022
Categories |
 RSS Feed